Pages

Sunday, July 28, 2013

Planting Cherry Bushes

I bought some cherry bushes online. They were so cheap compared to local prices, I couldn't resist. Six for less than $10. I bought a couple hostas for a dollar each as well. Shipping was a flat $10. Nice.


They took a few weeks to arrive, and I was surprised to find them delivered in a big green bag. They were shipped bare-root which makes sense after thinking about it. Soil is heavy and messy; why pay to ship it?


I dug the six holes and planted them with some better black dirt. The soil I took out was grey, and didnt look very nice. The new dirt should help them get established.


I added lots of mulch around them to help retain moisture. The woodchip mulch was free from the county yard waste site. I planted them in a row, so hopefully they will make a small hedge. At full size, they are supposed to be five foot tall and across. It will take a year or two beforw they start producing cherries. Time to water and wait.

Friday, July 26, 2013

Garden Fresh Golden Raspberries


I've been enjoying a small raspberry harvest most mornings this past week. We planted a single golden raspberry plant several years ago, and now we have eleven plants. I pruned them back this spring since I read it would help improve the yield. I'm not sure if it has, but it has made harvesting easier.

They have been a tasty treat while harvesting kale, chard, and spinach for morning smoothies.

Yum!

Sunday, July 21, 2013

More Mushrooms: Indoor Shiitake Kits


Our outdoor log isn't growing mushrooms fast enough and our innoculated logs won't fruit until next year. We purchased two Shiitake kits from fungi.com for $26 each after shipping. Each organic kit is supposed to grow two or more pounds. Shiitakes for sale locally go for $13-20 a pound, so this might work out if we can grow them successfully.


The two kits ready to grow in their humidity tents aka plastic bags with a couple holes. We hope they fruit in the next week or two. We're hungry for some Shiitakes.

Sunday, July 14, 2013

I’ve got Worms! Vermicomposting with the Worm Factory 360

Composting Worms

I mentioned in a previous post that I’ve been interested in composting worms aka vermicomposting for several years. The idea of non-smelly indoor composting sounded like a great addition to the compost pile outside. Outside works great most of the year, but is a bit of a hassle in the winter with heaps of ice and snow in the way.

After lots of searching online, I decided to buy my first bin rather than make one. I did this to raise my chances of success and to hopefully reduce mistakes while learning the ins and outs of taking care of worms and vermicomposting in general. I’ve done lots of reading, but experience is a much better teacher.

Worm Factory 360

The worm factory 360 is a worm bin where the worms continually migrate up into the top trays as the food in the lower trays is exhausted leaving behind their worm castings. The castings are an amazing soil amendment. It’s a clever system and made in the US. It came with a nice instructional book and DVD.

Worm Factory 360

This is the first bin ready for worms. I mixed some of the coconut coir and shredded paper the kit came with. I sprayed some water on everything to get it damp. In the upper left is their first meal of chard and spinach scraps mixed in with a couple dead peony flowers. I hope they like it.

Composting Worms

I ordered one pound of Red Wigglers (Eisenia fetida) which is about 1,000 worms. I tried to buy them locally, but couldn’t find anyone selling them (or giving them away).   I ordered on Sunday night from Special-Tworms, and they arrived Wednesday afternoon. They arrived well packed in shredded paper. The worms were inside a cotton bag mixed in with some compost. They were squirming around alive and well after their cross country trip in the mail.

Composting Worms

Red wigglers are hungry worms, and can eat half of their body weight in food each day. Impressive! They like the common 50/50 mix of browns and greens that would normally go into a compost heap. I’m looking forward to them eating my shredded junkmail. The population will self-regulate with how much food and space is available to them. The complete system should be able to support 5000-10000 (5-10lbs) depending on how we feed them. We eat a lot of vegetables and fruit, so I think we’ll keep them happy.

Worm Factory 360

After putting the worms in the first bin along with their bedding and first meal, I covered it with some wet newspaper as recommended in the worm book. The first problem was we haven’t had a newspaper delivered in years. What to use? I looked around the house, and found I was stashing some old motorcycle newspapers from a few years ago. No idea why I still had them, but they fit the bill wonderfully. The wet newsprint helps keep the moisture levels steady in the bin. The worms need things to be damp, so they can breath.

Worm Factory 360

I filled up another of the bins with shredded junk mail. This was a tip I found on youtube to help deter other things from moving in, specifically fruit flies.

Worm Factory 360

I placed the bin in the basement under the stairs. It is an out of the way place. The worms like a constant temperature between 40-85F with the sweet spot around 65-70F. The basement is in that range year round. It’s dark and quiet down there too, so I think they’ll be happy.

The first bin of compost should take a few months to finish. Now to think of some names for our pet worms…anyone got any good ideas?

Blueberries!

Blueberries

One of our blueberry bushes finally ripened up some berries. I didn’t expect to get any this year since we only planted them about two months ago, but I’m not complaining. They are still very immature plants. We picked about ten ripe ones with another dozen hopefully ripening over the next few days. Not a great return on investment, but so very, very tasty.

Monday, July 8, 2013

Digging and Planting a new Garden Bed

This weekend, I was busy digging and planting new garden beds. It may seem a bit late in the year to be digging and planting vegetables, but I’m mainly going after greens and things that produce in less than 60 days this year. With the first frost likely in September, I still have some time. This time I dug two beds. One in the front yard, and one in the back.

I prepared the first area by laying out some extra logs to get a rough idea of the size and shape. This one ended up being roughly 4x12 feet. The grass was problematic in the last bed I dug, so I used the weed trimmer to cut it down to the dirt. I raked the grass into a pile and used it as mulch on some other plants.


Digging and Planting a New Garden Bed

I spent what felt like two hours, but according to the dates on the photos was only 35 minutes digging the bed with a borrowed tiller. It doesn’t go as deep as double-digging, but is much faster. I also picked a 90F degree day to dig, so using the tiller was slightly less sweaty than digging by hand.

Digging and Planting a New Garden Bed

With a rake, I pulled out the remaining roots from the grass and made a small pile destined for the compost heap.

Digging and Planting a New Garden Bed

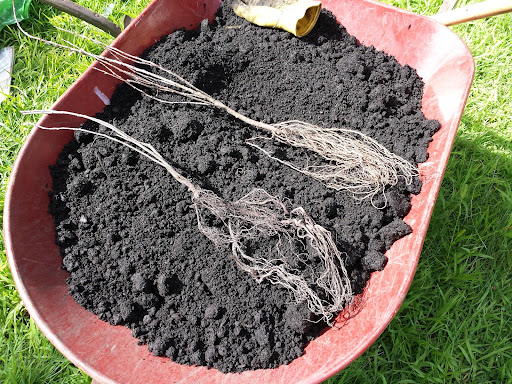
My soil isn’t the best as you can see from the photos, so I worked in some fertilizer to help the new seedlings get going. It is supposed to also have some helpful fungi and bacteria mixed in in addition to the usual fertilizer stuff. I’m a bit suspicious, but the reviews were quite positive. I guess we’ll see how it turns out. The fertilizer I used is: Dr. Earth Organic 5 for vegetables. The directions on the back say to mix in about a cup per ten square feet, so I used five cups.

Digging and Planting a New Garden Bed

I also spread some finished compost on the top of the soil after racking it smooth. After pushing the logs back in place, it is ready to plant! I really like the look of the logs on the edge of this bed. It is nice way to recycle some wood. If these weren’t diseased with brown rot, I’d turn them into mushroom logs and double the harvest from the space. Maybe I can get some to grow on straw mulch instead. Plants and fungi make a great partnership with each helping the other grow.

Digging and Planting a New Garden Bed

In the above bed, I planted some: spinach, mustard greens, northern lights chard, rainbow carrots, turnips, and some red amaranth. All have harvest dates at 60 days or less. I had a few leftover amaranth transplants, which found a home in the above bed.

Digging and Planting a New Garden Bed

The new bed in the backyard is much smaller. I’m nearly out of space back there. It is just a small 4x4 foot bed. I also outlined it with some left over logs from my neighbors tree. It was planted with collard greens, radishes, and some kale.

Digging and Planting a New Garden Bed

I watered both of them thoroughly, and now begin the waiting game. You can see some kale ready to harvest on the right edge of the above photo. Thinking about it making me hungry for another green smoothie. Yum.

Now we wait for the tasty little plants to grow.

Friday, July 5, 2013

How to Grow Mushrooms on Logs Outside

Our first Shiitake mushroom

Inspired by our shiitake log and curious how the process started, I spent some time online reading about growing mushrooms. The process typically starts by inoculating logs via sawdust or plugs. Plugs seemed to be the easiest way to do it on a small scale at slightly higher price than sawdust. Pure spores could also be used, but the other two have a higher success rate and a lower price. Mushrooms grown outside on logs are supposedly more flavorful than their indoor counterparts. 

Inoculating Logs for Mushrooms

Lots of the tasty varieties grow on logs. I found two sites online that were selling plug spawn: fungi perfecti and field & forest. We selected two types of oyster, one shiitake, and one turkey tail. Each of the above bags holds about 100 plugs which is enough to start two ideal logs. An ideal log is freshly cut and four to eight inches wide and three to four feet in length.

Inoculating Logs for Mushrooms

Thinking about drilling 50+ holes in each log was a bit overwhelming. A regular drill would take a long time. Field and Forest had an adapter to turn an angle grinder into a high-speed drill. I bought one with my plug spawn along with an 8.5mm high-speed bit. It made the process MUCH easier. I was able to drill a hole in about a second or maybe slightly less. It was impressively fast, and totally worth the small price of the adapter. Each hole was just over an inch deep which is slightly longer than the plugs.

Inoculating Logs for Mushrooms

I drilled the holes about six inches apart alternating each row to get a diamond pattern. Each of the holes would be the starting islands for the mycelium to spread out and colonize the log. Mycelium likes to connect to other mycelium, so the pattern gives the biggest mass and most coverage.

Inoculating Logs for Mushrooms

Next, we put the plug spawn into the holes. Plug spawn is essentially just wooden dowels colonized by mycelium. They usually have grooves for the mycelium to live in and survive being implanted into the logs. If they didn’t, the mycelium could be scrapped off when inserted. The mycelium is the white stuff on the dowel below. Wearing gloves is a good idea to avoid harming the mycelium due to antibacterial soap residue on your hands. An alternative to gloves is to rinse thoroughly.

Inoculating Logs for Mushrooms

A few gentle taps from a rubber mallet and the plugs are easily inserted.

Inoculating Logs for Mushrooms

We dabbed some soft wax over the holes to seal them up against the weather and insects. Mycelium are high in protein and apparently a tasty treat to roaming insects. They also dry out easily. We wanted to give them a chance to get established before having to worry about competition and weather.

Inoculating Logs for Mushrooms

A finished log ready to incubate. We were able to finish six logs in about 80 minutes including setup and cleanup. It would have gone faster, but the first two took a while as we figured out how it all worked. The grinder made a big difference in speed. 

Inoculating Logs for Mushrooms

Here is our incubation pile. This is a very shady spot in our backyard. The shade will help control moisture loss. The logs have been stacked so none are blocked from the rain by the log above. The six logs on top have been inoculated with plug spawn. In the upper left of the pile, you can see the metal tag we used to mark each log with date and strain. The bottom two logs have not been inoculated and are there just to keep the incubating logs off the ground. We want to give our mycelium a chance to get established before other competing with other varieties in the soil. Contact with the soil will cause the logs to decompose more quickly.

The incubation period is typically 9-12 months depending on how aggressive the strain is and the type of wood used. Each log should last several years hopefully fruiting several times each year. Next summer, we hope to get some mushrooms. Now we wait.

Tools Used:
Our first Shiitake mushroom

Wednesday, July 3, 2013

Lion’s Mane Mushrooms

Lions Mane Mushroom

Lion’s mane is also known as Hericium erinaceus, sheep’s head, bear’s head, and yamabushitake. Two months ago, I had never heard of this mushroom, and now I enjoy eating it. While browsing around on fungi.com I for mushroom kits to grow, I found this one. It’s goofy look charmed me into buying it an giving it a whirl.

Lions Mane Mushroom

It looks like a giant fluffy hunk of cauliflower to me. Apparently, it is best picked when young as several other mushrooms I’ve tried recently are as well. It’s also good to pick them before the spines get too long or they get a slight bitter taste. I’ve read ‘too long’ starts at 1/4”.

If you look closely at the picture below or above, you can see a slight discoloration on the ride side where the mushroom is going from white to yellowish. It is a sign the humidity wasn’t high enough for it, and it was getting a bit dried out. Dried out also leads to a slight bitter taste.

Lions Mane Mushroom

As a new mushroom grower, I’m still learning what they like. I found this one very easy to grow. Read: I didn’t screw it up completely on the first try like I did the pink oysters! It also grew rather quickly. The growth above only took about two weeks and weighed about six ounces. The kit should flush several more times. You can see in the last photo all the white fuzziness is the mycelium. They are still alive and healthy. They only need a bit of water and some light to fruit some more mushrooms.

Paul Stamets, mushroom guru, wrote a nice article about some of the medicinal properties on the Huffington Post: here which includes memory and mood improvement and maybe nerve regrowth. Neat.

So how does it taste? I’d read that it tastes like lobster or other seafood. Neither of us thought it tasted like lobster, but it did have the chewy texture of lobster. We both enjoyed it, and would eat it again. To read more about how I cooked it, check out the recipe I posted on my food blog: Everyday Tastiness: Poached Lion’s Mane Mushroom.

Lions Mane Mushroom on Black Rice with Brussels Sprouts